Pioneering Productivity: How a Biopharmaceutical Leader Revolutionized Collaboration with Microsoft Solutions

Collaboration with Microsoft Solutions

In the demanding world of biopharmaceuticals, where every discovery, every research finding, and every collaborative decision can impact patient lives, efficiency and innovation are paramount. Companies in this sector are constantly striving to accelerate their scientific endeavors, streamline complex research and development cycles, and ensure seamless communication across geographically dispersed teams. However, many find their progress hampered by outdated collaboration tools, fragmented data repositories, and a lack of robust governance.

Collaboration with Microsoft Solutions

This challenge is not unique to a single organization; it’s a common pain point across the biopharmaceutical industry. As a Microsoft Solutions Partner, Cambay Solutions frequently encounters organizations grappling with content sprawl, limited information discoverability, and an overall suboptimal user experience that hinders productivity. This article delves into a real-world case where a leading biopharmaceutical company, committed to developing therapies for serious and rare diseases, embarked on a transformative journey to overcome these very obstacles, establishing a new benchmark for collaborative excellence.

The Imperative for Change: Addressing the Collaboration Conundrum

Our client, a prominent player in the biopharmaceutical industry, recognized that their existing collaboration infrastructure was no longer equipped to support their ambitious growth and innovation objectives. The challenges they face are familiar to many organizations operating in highly regulated and data-intensive fields:

  • Content Governance Deficiencies: A lack of centralized control over content creation, storage, and lifecycle management led to inconsistencies, version control issues, and difficulty in ensuring compliance with stringent industry regulations. In biopharma, proper governance is not just about efficiency; it’s about maintaining data integrity and meeting regulatory mandates.
  • Information Silos and “Site Sprawl”: Over time, numerous departmental data stores and ad-hoc collaboration sites have emerged. This fragmentation created isolated pockets of information, making it incredibly difficult for employees to locate essential documents, leading to duplicated efforts and hindering cross-functional insights critical for research and development.
  • Limited Discoverability of Crucial Data: Even when content existed within the various systems, finding it was often a time-consuming and frustrating exercise. Inefficient search capabilities meant that valuable research data, clinical trial results, and strategic insights remained hidden, preventing teams from leveraging existing knowledge and accelerating new initiatives.
  • Suboptimal User Experience: The disjointed nature of their collaboration tools resulted in a clunky, inconsistent, and often frustrating user experience. This not only impacted on employee morale and productivity but also created resistance to adopting new tools, undermining the very collaborative spirit the organization sought to foster.
  • Scalability Concerns: With aggressive plans for future expansion, increasing data volumes, and a growing workforce, the existing infrastructure lacked the scalability and flexibility to support the company’s long-term vision. They needed a future-proof solution capable of evolving with their dynamic business needs.

Suboptimal User Experience

Recognizing these critical challenges, the biopharmaceutical leader sought a comprehensive, scalable, and secure solution that would not only resolve immediate pain points but also establish a robust foundation for enhanced collaboration and productivity.

The Solution: “Collab 2.0” – A Microsoft Teams-Powered Transformation

To address these multifaceted challenges, Cambay Solutions, drawing upon its deep expertise as a Microsoft Solutions Partner, designed and implemented a comprehensive collaboration platform, internally referred to as “Collab 2.0.” This solution was strategically built upon the Microsoft Teams platform, leveraging its inherent capabilities for unified communication, integrated applications, and seamless integration with the broader Microsoft 365 ecosystem.

The technical architecture was meticulously crafted to deliver a highly functional, secure, and user-friendly environment:

  • Microsoft Teams as the Central Collaboration Hub: At the core of “Collab 2.0” was Microsoft Teams, which provided a single, centralized platform for all communication, virtual meetings, real-time document co-authoring, and application access. Teams’ channel-based structure allowed organized departmental and project-specific collaboration, effectively dismantling existing information silos. This facilitated more agile and responsive project management, critical in fast-paced research environments.
  • SharePoint Online for Enterprise Content Management: We leveraged SharePoint Online as the robust backbone for all content management. SharePoint’s enterprise-grade features delivered secure document storage, comprehensive version control, granular access permissions, and advanced document management capabilities. This directly addressed the content governance and discoverability challenges, providing a structured, searchable, and compliant repository for all critical scientific and operational documents.
  • Azure Functions for Automated Processes: To enhance efficiency and ensure data integrity, custom Azure Functions were developed. These serverless computing components automated various critical processes, including complex data migration tasks from legacy systems and routine backup operations. This automation minimized manual intervention, reduced the risk of human error, and ensured the reliable handling of sensitive biopharmaceutical data during the transition and ongoing operations.
  • PowerApps for Tailored Business Applications: The agility of the Microsoft Power Platform was harnessed through PowerApps. Custom applications were developed to cater to specific business needs, such as a streamlined PTO (Paid Time Off) request management system. This demonstrated the flexibility of the platform in extending Teams’ functionality to automate and improve various internal workflows, enhancing overall operational efficiency and the user experience.
  • PnP Search Webparts for Enhanced Content Discoverability: To overcome the challenge of limited information discoverability, the user interface within Teams was significantly enhanced using PnP Search Webparts. These powerful web parts provided a highly robust and intuitive search experience, enabling users to quickly and accurately locate the information they needed, irrespective of its location within the new environment. This significantly improved knowledge sharing and accelerated access to vital research and operational data.

Initial Health Check and Assessment

Phased Execution: A Smooth Transition to Modern Collaboration

The implementation of “Collab 2.0” was executed through a carefully planned, phased approach, designed to minimize disruption to the client’s critical operations while ensuring maximum impact:

  1. Initial Health Check and Assessment: Cambay Solutions began with a comprehensive health check of the client’s existing IT infrastructure and collaboration landscape. This crucial first step involved a detailed assessment of their current content, identification of key pain points, and a deep understanding of specific departmental needs and workflows. This thorough analysis formed the bedrock for a truly tailored and effective solution design.
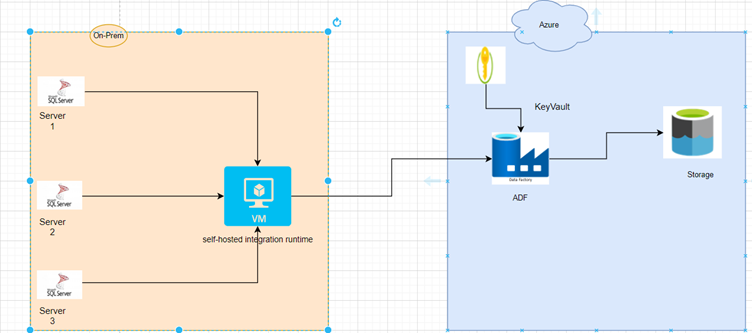
  2. Solution Development and Content Migration: Following the detailed design phase, Cambay Solutions proceeded with the development of the “Collab 2.0” solution within Microsoft Teams and SharePoint Online. Simultaneously, a meticulous and large-scale content migration process commenced. This involved the secure transfer of a significant volume of documents, files, and other critical data from seven different legacy data stores to the new Microsoft Teams environment. This complex undertaking was carefully planned and executed to minimize operational disruption and ensure absolute data integrity. The custom Azure Functions played a pivotal role in automating and streamlining critical aspects of this migration.
  3. Comprehensive Governance Implementation: Recognizing the paramount importance of a secure and compliant environment within the biopharmaceutical sector, a robust governance framework was established. This included defining clear policies for content creation, data retention, access control, and security within Microsoft Teams and SharePoint. This proactive approach ensured that the client’s sensitive intellectual property and regulated data remained protected, and that all relevant compliance requirements were met. This also laid the essential foundation for long-term sustainability and efficient management of the new platform.

Navigating Challenges_ A Collaborative Path to Success

Navigating Challenges: A Collaborative Path to Success

Large-scale digital transformations, particularly in complex industries like biopharma, often present unique challenges. Cambay Solutions, in close collaboration with the client’s internal teams, approached these with a proactive and problem-solving mindset:

  • Integration Complexity: Integrating the new Microsoft 365 environment with the client’s existing legacy infrastructure posed significant technical complexities. This was effectively managed through detailed planning sessions, extensive technical collaboration between Cambay Solutions and the client’s IT stakeholders, and a phased integration strategy. APIs and custom connectors were leveraged to ensure seamless data flow and functionality between disparate systems.
  • User Adoption: Ensuring widespread user adoption of new tools and processes is frequently the most critical aspect of any digital transformation. Cambay Solutions implemented a multi-faceted user adoption strategy, recognizing that technology’s value is realized only when embraced by its users. This strategy included:
    • Tailored Training Programs: Extensive training sessions were conducted for all seven departments, focusing on the core functionalities of Microsoft Teams, SharePoint Online, and the custom PowerApps. These sessions were designed to be highly practical, emphasizing real-world use cases relevant to each department’s daily activities.
    • Comprehensive Documentation and Support: User guides, FAQs, and quick reference materials were developed and made readily accessible within the new Teams environment, providing self-service support and reinforcing training.
    • Internal Champion Network: Key individuals from each department were identified and empowered to become “champions,” acting as internal advocates and providing peer-to-peer support, which significantly boosted overall adoption rates.
    • Open Communication and Feedback Loops: Transparent communication channels were established to gather user feedback, address concerns promptly, and iteratively refine the solution to better meet evolving user needs, fostering a sense of ownership among the user base.
  • Scale of Content Migration: The sheer volume and diversity of content being migrated from seven distinct legacy data stores presented a substantial logistical and technical undertaking. This challenge was managed through:
    • Phased Migration Strategy: The migration was meticulously broken down into manageable phases, often executed department by department, to minimize risk, allow for iterative improvements, and ensure business continuity.
    • Automated Tools: The strategic use of Azure Functions for automated data transfer and validation significantly reduced manual effort, accelerated the migration timeline, and minimized the potential for errors.
    • Data Cleansing and Standardization: Prior to migration, a thorough data cleansing and standardization process was undertaken. This ensured that only relevant, accurate, and properly formatted data was transitioned to the new environment, improving the overall quality and utility of information within the new system.
    • Dedicated Migration Expertise: A specialized team from Cambay Solutions, with deep expertise in large-scale data migration, oversaw the entire process, ensuring smooth execution, proactive troubleshooting, and seamless data integrity.

Project Closure and Transformative Outcomes

The “Collab 2.0” project was successfully brought to completion, marked by a formal closure meeting where all deliverables were reviewed and officially signed off by key stakeholders from the biopharmaceutical company. This milestone represented not just the conclusion of a project, but the successful establishment of a modern, efficient, secure, and scalable collaboration platform that profoundly impacted the client’s operations.

The implementation yielded significant and measurable benefits across the organization:

  • Elevated Collaboration and Communication: Microsoft Teams became the singular, central hub for all internal communication, replacing fragmented tools and significantly reducing email clutter. Real-time chat, seamless video conferencing, and structured team channels fostered unprecedented levels of collaboration across diverse departments and global locations. This directly translated into accelerated decision-making and more efficient project execution, particularly crucial for research and development cycles.
  • Robust Content Governance and Discoverability: With SharePoint Online serving as the structured backend, the biopharmaceutical leader achieved superior content governance, ensuring consistency, version control, and strict compliance with regulatory standards. The integration of PnP Search Webparts dramatically improved content discoverability, empowering employees to quickly access critical information, reducing wasted time, and significantly enhancing knowledge sharing.
  • Streamlined Data Management: The successful migration of content from seven disparate legacy data stores to a centralized Microsoft Teams and SharePoint environment eliminated existing data silos and significantly streamlined data management processes. This resulted in reduced operational overhead, improved data integrity, and a single source of truth for critical information.

Streamlined Data Management

  • Increased Productivity and Operational Efficiency: The strategic implementation of automation through Azure Functions, coupled with custom PowerApps for specific workflows, streamlined numerous business processes. This reduction in manual tasks allowed employees to dedicate more time to higher-value activities, leading to a demonstrable increase in overall productivity across the organization.
  • Future-Ready Scalability: The “Collab 2.0” solution, built on the inherently flexible and scalable Microsoft Cloud, provides the biopharmaceutical client with a future-ready platform. This robust infrastructure can effortlessly accommodate their evolving needs, increasing user base, and growing data volumes, ensuring that their collaboration capabilities will continue to support their ambitious growth trajectory and scientific advancements.
  • Empowered and Positive User Experience: By consolidating disparate tools into a single, intuitive interface within Microsoft Teams, the overall user experience was dramatically enhanced. This led to greater user satisfaction, increased engagement, and higher adoption rates of the new collaborative tools, fostering a more positive and productive work environment.
  • Strengthened Compliance Posture: The meticulously implemented governance policies and the inherently secure environment built on Microsoft’s enterprise-grade cloud capabilities significantly bolstered the client’s compliance posture, which is non-negotiable for a biopharmaceutical company handling sensitive data and operating under strict regulatory frameworks.

The Path Forward: Continuing the Journey of Innovation

The successful implementation of “Collab 2.0” has established a strong foundation for the biopharmaceutical leader’s ongoing digital transformation journey. Discussions are actively in progress for a subsequent phase of the project, which will focus on further enhancements, the integration of additional features, and the exploration of new capabilities to support the client’s evolving needs. This likely includes leveraging advanced analytics, further integrating AI and machine learning capabilities within Microsoft 365, and optimizing the platform for greater efficiency and scientific innovation.

Partnering for Progress: The Cambay Solutions Advantage

The “Collab 2.0” project exemplifies how Cambay Solutions, as a dedicated Microsoft Solutions Partner, delivers tangible and transformative value to its clients. Our expertise in leveraging the full power of Microsoft technologies – from the collaborative capabilities of Microsoft Teams and the robust content management of SharePoint Online to the automation power of Azure Functions and the bespoke application development with PowerApps – enables us to design and implement tailored solutions that directly address complex business challenges.

Deep Technical Expertise

Our commitment to our clients is rooted in:

  • Deep Technical Expertise: Our team possesses profound knowledge of the Microsoft ecosystem, ensuring that solutions are designed for optimal performance, stringent security, and scalable growth.
  • Strategic Planning and Meticulous Execution: We collaborate closely with our clients to understand their unique operational needs, establish clear project objectives, and execute projects through well-defined, phased approaches that minimize risk and maximize impact.
  • Unwavering Focus on User Adoption: We understand that technology’s true value is unlocked through widespread user adoption. Our comprehensive user adoption strategies, encompassing targeted training and continuous support, ensure a smooth transition and a maximized return on investment for our clients.
  • Prioritizing Governance and Security: Especially in highly regulated industries like biopharma, we place paramount importance on building secure, compliant, and well-governed environments.
  • A Partnership for Sustained Success: We view our relationships with clients as long-term partnerships, providing ongoing support, proactive maintenance, and strategic planning for future enhancements to ensure sustained value and continuous innovation.

If your organization, regardless of its industry, is seeking to enhance collaboration, streamline complex operations, improve data governance, and unlock the full potential of your digital workspace, Cambay Solutions is your trusted Microsoft Solutions Partner. Like the biopharmaceutical leader in this case, you can achieve a truly transformative digital experience, empowering your teams, accelerating your strategic objectives, and maintaining a competitive edge in today’s dynamic business landscape. Contact us today to explore how we can tailor a Microsoft-powered solution to meet your unique challenges and drive your success.

Data Ingestion Made Easy: Moving On-premises SQL Data to Azure Storage

On-premise SQL data to Azure (1)

Data ingestion from different on-premises SQL systems to Azure storage involves securely transferring and storing data from various on-premises SQL databases into Azure data storage solutions like Azure Data Lake Storage, Azure Blob Storage, or Azure SQL Data Warehouse. This data movement is essential for organizations looking to centralize, analyze, and leverage their data within the Azure cloud environment.

Business Scenario

The demand for swift, informed decision-making is paramount in the contemporary business landscape. Organizations seek tools capable of swiftly generating insightful reports and dashboards by consolidating data from diverse, critical aspects of their operations.

Envision a scenario where data from multiple pivotal systems seamlessly converges into a readily accessible hub. Enter Azure’s robust Data Integration service—Azure Data Factory. This service excels at aggregating data from disparate systems, enabling the creation of a comprehensive data and analytics platform for businesses. Frequently, we deploy this solution to fulfill our customers’ data and analytics requirements, providing them with a powerful toolset for informed decision-making.

Business Challenges

Below are some challenges that may be faced during the data ingestion process to Azure.

  • If SQL servers are outdated and change, the data capture mechanism doesn’t support incremental loads. Additional efforts are needed to implement gradual data change functionality, like creating control tables.
  • The data format will have some challenges if data is stored in storage accounts instead of databases on Azure. The parquet format helps fix this problem.

Solution Strategy

  • Identify the source entities\views\tables from the database system. Also, identify the column that needs to be used for incremental changes (mostly date column preferred in table\view).
  • Install and configure the self-hosted integration run time on an on-premises server with access to SQL servers.
  • Create a Key Vault to store credentials. These credentials are useful during link services creation in Azure Data Factory.
  • Create a source file and add all the source system tables into the tab for each source. Future table additions\deletions\updates will happen through this file only.
  • Create a similar type of file for incremental loads. This file will include a column name that refers to incremental changes.
  • Create source and destination link services.
  • Create source and destination datasets for associated tables\views in the database.
  • Create a watermark table and store procedure in a Serverless Azure SQL table. It is required for incremental loads.
  • Create an entire load pipeline. The pipeline uses previously created source and destination link services and datasets. It also uses lookup and filter activity only to collect the data from mentioned tables in the source file.
  • Follow similar instructions for the incremental load pipeline with additional steps to get the data difference from the previous copy to the current one using watermark column values.
  • Schedule the pipelines and add a monitor to notify upon failures.
  • Validate data by counting rows and sample row data on both sides.
  • Validate watermark table updates upon incremental load pipeline execution.

Moving On-premises SQL Data to Azure Storage

Fig 1: Full Load Sample Pipeline Structure

On-prem sql to Azure

                    Fig 2: Incremental Loads Sample Pipeline Structure

SQL Server to Azure

         Fig 3: Look up


Outcome & Benefits

  • Design the entire solution with parameterization. It can be replicated in multiple projects to reduce repetitive efforts.
  • ADF supports automated and scheduled data ingestion.
  • A robust system for monitoring and logging errors, facilitating seamless troubleshooting.
  • ADF supports 100+ connectors as of today.

Conclusion

Are you ready to transform your data management and unlock valuable insights within your organization? Take the first step towards a more data-driven future by exploring our data ingestion solutions today. Contact our data and analytics experts to discuss your needs and embark on a journey towards enhanced data utilization, improved business intelligence, and better decision-making.

Building Disaster Recovery Solution on MongoDB Atlas Clusters

Building Disaster Recovery Solution on MongoDB Atlas Clusters

Disaster recovery solutions are critical for ensuring the continuity and resilience of data in any modern database system, including MongoDB Atlas clusters. These solutions mitigate the potential impact of catastrophic events like natural disasters, hardware failures, or human errors that lead to data loss or service interruptions.

MongoDB Atlas is a managed cloud database service that offers robust disaster recovery capabilities to safeguard valuable data. One key feature of MongoDB Atlas is the ability to create regular backups of the entire cluster. These backups capture the state of the data at a specific time, enabling organizations to restore their databases to a known state in the event of data corruption or accidental deletion.


Business Scenario:

In this blog, I will explain the configurations and testing challenges of the Disaster recovery solution of MongoDB atlas clusters hosted on Azure. Disaster recovery configuration is straightforward by selecting desired regions but testing the solution along with applications\microservices running on Azure is a complex process. Some additional configurations should be done to keep the Disaster recovery solution in working condition to meet audit and business requirements.


Business Challenges:

   You may encounter below challenges while testing disaster recovery solutions:

  • There needs to be more documentation on network connectivity among MongoDB Atlas replicas across the regions and Azure.
  • We may need help because a few regions from Atlas have similar public IPs to use in connectivity establishment. In that case, we need to choose different regions for our configuration.
  • While choosing regions\locations need to consider specific compliance requirements or data sovereignty concerns, data residency, privacy laws, and regulatory audits ensuring that disaster recovery configurations comply with relevant regulations can be challenging.
  • Ensuring robust and low-latency network connectivity between the primary and secondary environments can be challenging, especially when dealing with different geographic regions.


Solution Strategy:

  • Choose the right application connection string from the MongoDB atlas connections wizard.
  • The selection of the connection string must be made based on the application stack we use to develop the application.
  • Please choose the appropriate application drivers and keep them up-to-date.
  • If the connection is established between Azure and Mongo Atlas with V-net peering, please do the V-net peering for each Azure atlas region replica independently and test the connection.
  • If the connection is established with an endpoint between Azure and Mongo Atlas, an endpoint must be created for each replica region in Atlas with Azure resource details.
  • Use Mongo CMD shell or Mongo Compass to check whether the connecting string works correctly after V-net peering to each region.
  • Check the connectivity with individual replica connection strings and cluster-aware connection strings from the application-hosted system \service etc.
  • Use a standard connection developed for multi-region replicas (cluster aware) instead of a single replica connection string.
  • Conduct thorough testing of failover and failback scenarios to ensure the resilience of disaster recovery configuration. Trigger a failover from the primary region to a secondary region and validate that the application functions correctly. Test the process of failing back to the primary region once it is restored.
  • Continuously monitor the replication lag between regions, cluster health, and backup status. Set up alerts to proactively identify any issues.
  • Additionally, configure read and write preferences to optimize data access and distribution. For example, we can configure read preference to allow reads from secondary regions to distribute the workload, improve performance, and separate replicas for Analytics purposes.

Outcome & Benefits:

  • Self-Healing Clusters. Failover and Failback are handled very quickly.
  • Always availability. Robust backup mechanism with <1 min RPO.
  • Multi-Cloud Failover. It can be scattered among three major clouds.
  • 99.995% Uptime across all cloud providers.
  • Compliance with audit requirements

How to migrate Azure Subscription from one Tenant To another Tenant

Business Scenario:

The following are some reasons why customer might plan to migrate a subscription from one tenant to another:

  • Mergers and acquisitions: One of the reasons why companies may need to reduce their spending and subscriptions is when they undergo mergers and acquisitions. This process involves two companies joining together or one company taking over another, which can result in overlapping or redundant resources.
  • Management: The customer wants to manage all subscriptions under one Azure AD directory, but someone in their organization created a subscription with a different directory.
  • Complexity: Changing the settings or code of customer applications is difficult since they depend on a specific subscriber ID or URL.
  • Corporate restructuring: As part of our business restructuring, we have created a new company that will operate independently from our current one. This means that some of your services and resources will be transferred to a different Azure AD directory.
  • Compliance requirements: One common scenario is that customers want to manage some of their resources in a separate Azure AD directory for security isolation purposes.

Challenges:

The following are some challenges in migrating subscription from one tenant to another.

  • Technical complexity: Migrating a subscription between tenants involves migrating data, resources, and configurations.
  • Downtime: Migrating a subscription between tenants may require downtime, impacting your business operations. To minimize downtime and to communicate any planned downtime to your users in advance.
  • Loss of configuration: If your subscription has complex configurations, such as custom policies or resource templates, these configurations may not transfer automatically during the migration.
  • Security concerns: Migrating a subscription between tenants may raise security concerns, particularly when moving sensitive data.
  • Cost implications: Migrating a subscription between tenants may have cost implications, particularly when moving to a tenant with a different pricing structure.
  • Resource availability: Migrating a subscription between tenants may impact your resource availability, particularly when moving to a tenant with a different region availability.

Solution Strategy:

Overview

  • Tenant: When you sign up for a Microsoft cloud service subscription, you automatically create an Azure Tenant, a dedicated and trusted instance of Azure Active Directory. A tenant represents your organization, identity, or person and contains all the accounts and billing connections for the Azure services you use.
  • Subscription: A Subscription is a private space with a unique ID within the Tenant where you can deploy and manage all the resources you use in the cloud, such as virtual networks, virtual machines, databases, and various services.


Understand the impact of migrating a subscription.

  • Several Azure resources are dependent on a directory or a subscription. Depending on the circumstances. See, resources are impacted.
  • Make sure to examine each component to see if it is still necessary. This is particularly valid if the membership offers access to some development or testing environments.
  • You should review your subscription and associated costs, such as data transfer, to ensure the move is cost-effective.
  • Pull together all your documentation on the solution and components within the subscription.
  • Go through every Microsoft reference posting about the migration of subscriptions.
  • Establish who will migrate subscriptions, whether it is Microsoft or a representative of one of the businesses.

Check list for adding Azure source subscription to destination tenant

  1. Several Azure resources are dependent on a directory or a subscription. Depending on the circumstances. See, resources are impacted.
  2. Make sure to examine each component to see if it is still necessary. This is particularly valid if the membership offers access to some development or testing environments.
  3. You should review your subscription and associated costs, such as data transfer, to ensure the move is cost-effective.
  4. Pull together all your documentation on the solution and components within the subscription.
  5. Go through every Microsoft reference posting about the migration of subscriptions.
  6. Establish who will migrate subscriptions, whether it is Microsoft or a representative of one of the businesses.

Procedure for migrating Subscription from one tenant to another.

    1. The first step is to create a user with access to both tenants. The user needs to have an active email id, and I will use the global admin of the “TenantA” tenant for this purpose.
    2. log in to Tenant, the old Tenant (TenantB), with an admin account and go to “Azure Active Directory -> Users,” and press “New guest user.”
    3. Assign owner rights for the subscription to the guest we have just added. It is required to be able to see and move the subscription to another tenant. Go to subscriptions -> Access control (IAM) and press “Add” in Add a role assignment.
    4. To assign the guest user the “Owner” role, choose “Owner” from the role options and select the guest user. Select “Save” to apply the changes.
    5. Look for an email with an invite in the guest user’s inbox. Access the email and press “Get Started.”
    6. Sign in with the credentials of the Guest User to the new Tenant (TenantB). These are the same credentials used to login into the old Tenant. (TenantA).
    7. You are a guest user in this Tenant. To access its resources, you must consent to the permissions. Click “Accept” to proceed.
    8. check if you are the correct Tenant in the Azure portal. If not, select “Switch directory.”
    9. Select the “all directories” tab; here, you should see both the old Tenant (TenantB) and the new Tenant (TenantA). Select the old Tenant (TenantB).
    10. To change your subscription, navigate to the subscriptions page and choose the subscription that you want to move.
    11. Sign in and select a subscription from the Subscriptions page in the Azure portal.
    12. Select the subscription, press “Change directory,” and select the new Tenant—press “Change” to apply the changes.
    13. Review the warnings. All Role-Based Access Control (RBAC) users with assigned access and all subscription admins lose access when the subscription directory changes.
    14. Select a directory.
  1. Success! To access the new directory, click on the directory switcher. It might take 10 to 30 minutes for everything to show up properly.
  2. both subscriptions are displayed in the “Subscriptions” view.
  3. The subscription has now been moved from the old Tenant (TenantB) to the new Tenant (TenantA).

Post migration validation steps.

  1. Verify accessibility to all major resources in the subscription as an owner.
  2. Validate the correct production operation of all applications within the subscription.
  3. Confirm the ability to see billing information in the Enterprise Azure Portal.
  4. Set up all RBAC-based accounts needed to support the application and infrastructure support activities. Assign those accounts permissions to the subscription.
  5. Create and assign any replacement management certificates as required.
  6. Validate that all backup routines are working.
  7. Validate that all logic apps are working correctly.
  8. Any Azure key vaults you have are also affected by a subscription move, so change the critical vault tenant ID before resuming operations.
  9. If you want to delete the original directory, transfer the subscription billing ownership to a new Account Admin.
  10. Store SSL Certificate in the Destination subscription key vault; if you have any key vaults, you must change the key vault tenant ID.
  11. You must re-enable these identities if you used system-assigned Managed Identities for resources. If you used user-assigned Managed Identities, you must re-create these identities. After re-enabling or recreating the Managed Identities, you must re-establish the permissions assigned to those identities.
  12. You must re-register if you’ve registered an Azure Stack using this subscription.
  13. Refer to the link for more information Transfer an Azure subscription to a different Azure AD directory.

Benefits:

Below are some benefits of migrating Azure subscription from one tenant to another tenant.

  • Consolidation of resources: If multiple subscriptions are spread across different tenants, moving them to a single tenant can make managing and monitoring your resources more accessible.
  • Improved security: Moving a subscription to a more secure tenant can reduce the risk of data breaches and cyber-attacks. This can be especially important when dealing with sensitive or confidential data.
  • Simplified billing: Keeping track of billing and payments can be challenging if you have multiple subscriptions across different tenants. Moving them to a single tenant can simplify this process and make it easier to track expenses.
  • Better collaboration: If you need to work with others in a different tenant, having your subscription in the same Tenant can make collaborating and sharing resources easier.
  • Subscriptions to a single tenant can simplify management, reduce costs, and improve team collaboration.

How to move Azure VM backup from GRS to LRS

GRS provides a higher level of redundancy by replicating data across two Azure regions, which helps to ensure that backup data remains available in the event of a regional outage. However, this comes at a higher cost and may not always be necessary for all backup scenarios.

On the other hand, LRS provides a lower level of redundancy by replicating data within a single Azure region, which may be sufficient for some backup scenarios while being more cost-effective.

Therefore, moving Azure VM backup from GRS to LRS can help reduce backup costs while still maintaining an acceptable level of redundancy, depending on the business continuity requirements of the organization. It’s important to assess the backup requirements of the organization and ensure that the chosen backup strategy aligns with those requirements to ensure adequate protection of critical data.

If a customer is charged for VMs backed up in the Recovery Services vault with GRS Redundancy, it affects the customer’s monthly budget. Moving the Recovery Services vault to LRS could be a solution. However, if we implement it directly, it will lose all the existing backed-up data.

Business Challenge:

By default, any Recovery services vault is configured in GRS. Running the Recovery Services vault in GRS will cost more Azure storage consumption. Moving data from GRS to LRS would save cost up to a reasonable extent, but there will be a loss of backed-up data during the transition.

Solution Strategy:

Please follow the below steps to change from GRS to LRS and avoid data loss.

  1. You should have 7-14 (recommended) backup copies all the time while moving the backup items from one recovery services vault (GRS) to another (LRS).
  2. So, to move from GRS to LRS, Recovery Services Vault, you should configure disk snapshots for all the VMs first in Automation account by adding it into the backup schedule. You should wait for “7-14” backups copies for all VMs in place. You can verify that by going into the respective storage account and then proceed with deletion of back-up data in GRS Recovery Services Vault.
  3. Remove backups item from the Recovery Services Vault (GRS). Delete the back-up data from the Recovery Services Vault, and unregister the server from the GRS Recovery Services Vault.
  4. Register the Servers to the new Recovery Services Vault with LRS redundancy for all the servers, which need to be backed up and provide retention rage 7-14 days (Recommended).
  5. Once you have the first copy of the backup in the LRS recovery services vault for all VMs, you can delete the oldest first copy of the disk snapshot back up from the automation account (as this incurs a charge, too).
  6. You will have 7-14 copies of backup data in the Recovery Services vault with LRS redundancy. You will eliminate GRS and, finally, lots of cost savings per VM by deleting the Recovery services vault with GRS redundancy and the Automation account created for VM disk snapshots.

Solution Diagram

1. Azure VM backup with GRS redundancy with 7-14 copies of backup.

Azure VMs Silution


Backup flow diagram for the VM backup configured in GRS redundancy.


Azure VMs Silution


2. Disk snapshots of all the VMs get configured in Automation account and have 7-14 copies of backup before registering into LRS recovery services vault.


Azure VMs Silution


3. Servers are registered into the new backup vault with LRS redundancy with 7-14 copies of data.


Azure VMs Silution


Backup flow diagram would be same in LRS redundancy.


Azure VMs Silution

Benefits:

  1. Recovery services vault will be configured in Locally redundant storage.
  2. No data loss during transition.
  3. Approximately $500 per VM can be saved annually.

How to Connect Azure DevOps Applications in Azure China Cloud Migrate SQL Server Databases to Azure

Business Scenario:

Connecting Azure DevOps applications in Azure China Cloud requires some additional steps compared to the standard Azure cloud environment. Follow below steps to deploy an Application from Azure DevOps to Azure Non-Global Environment which is Azure China cloud (21vianet).

  • Deploy Azure Kubernetes Service application from Azure DevOps, which is in a different region to non-Global Azure China Subscription.
  • As China Azure Cloud is physically separated from other Clouds, we need to establish communication of Azure DevOps with Azure China Cloud.
  • To Establish a connection, configure a Role Based access in Azure DevOps.

Business Challenges:

  • You can’t install or deploy any applications from the outside world to Azure China Cloud, as it is Azure Non-Global Environment.
  • Azure DevOps is not authorized to access your Azure resources within non-global Azure subscriptions.
  • SSO (single Sign on) will not authenticate from other regions to establish a connection between Azure Resources and Azure DevOps.

Solution Strategy:

  1. In Azure DevOps, select the Azure China Cloud.
  2. Create a New Service connection.
  3. Select a created Service Account from the Authentication method. This will provide a token that will never expire.
  4. Once the authentication method is established, you can select the Subscription to which access needs to be provided.
  5. Provide an Azure resource API server URL and Secret Value of the Service Account.
  6. Create a role and Role bindings that grant permissions to the desired service account.


Connect Azure DevOps Applications in Azure China Cloud


By configuring the above steps, you can see the “Success Or Error” in the Service connection to validate the Access of Azure resources from Azure DevOps.

Outcome & Benefits:

  • This process will help us establish a connection between the Azure Non-Global Cloud and Azure DevOps.
  • Quickly deploy applications from Azure DevOps to Azure China Cloud irrespective of region.
  • You can access Azure DevOps and Azure Subscriptions of China Cloud with SSO.

How to Migrate SQL Server Databases to Azure

Migrating legacy SQL Server databases to Microsoft Azure is a common task for organizations looking to take advantage of the benefits of cloud computing. There are several ways to migrate your SQL Server databases to Azure, including Azure Database Migration Service (DMS) or the Azure Site Recovery service.

Business Scenario:

If you’re running on legacy SQL Server versions (2008R2\2012) with large size of databases (>1 TB) and want to migrate & upgrade to the latest versions of SQL Server on Azure with minimal application downtime, then follow this blog.

Business Challenges:

Below are some of the challenges you must be facing –

  • SQL Server versions are already outdated, so there is no support from Microsoft regarding Service Packs\patches\Bug fixes.
  • Lift & shift is not possible for migration to the cloud because of outdated software versions.
  • If your business is 24*7, you can’t have a long change window during migration.
  • Since these databases are large, the traditional backup and restore method is not recommended.

Solution Strategy:

To overcome the above challenges, we can use SQL Server Log shipping for this migration.

  • SQL Server Log shipping automatically sends transaction log backups from a primary database server to one or more secondary databases on a separate secondary server.
  • Apply transaction log backups to each of the secondary databases.
  • Establish the connectivity between On-prem and Azure Server.
  • Create a shared folder on the On-premises server to dump the scheduled log backups.
  • Enable Log shipping for the huge size databases between on-premises and Azure.
  • Kept the schedule of backups, copy, and restore every 15 mins.
  • Initial Database backup and restore would take time because of the database size.
  • Transfer other required SQL Server Agent Jobs and Logins to the Azure server.
  • At the time of the cutover, ensure all the pending backup files are restored on the Azure server.
  • Once the restore is complete, stop the connection on on-prem for a few minutes, take the final backup on on-prem, and restore it on Azure (execute jobs manually currently).
  • We must match the data on both servers with database size and row count to avoid data loss and break-log shipping.
  • Recover the databases on the Azure server and update the connection string with the Azure server.
  • Perform post-migration tasks.
Migrate SQL Server Databases to Azure

Outcome & Benefits:

  • Improved security, access to latest SQL Server features and support from Microsoft
  • Reduced downtime.
  • Low cost of migration as we are not using any licensed software and hosting cost on Azure.
  • Improved the database performance.

How to Build security toll gate on azure and on-premises resources

A security toll gate is a checkpoint or control point to manage access to a secure area or system. The security toll gate can take many forms, from physical gates or barriers to electronic systems requiring authentication and authorization. The purpose of a security toll gate is to provide an additional layer of security to protect against potential threats and help maintain the integrity and confidentiality of the protected area or system. Effective security toll gates protect against cyber-attacks, data breaches, and other security threats.

In this blog, we will discuss about how to build an effective security toll gates for Azure and on-premises resources.

Business Scenario:

Let’s consider a scenario where a customer has infrastructure on Azure and on-premises, and they want to deploy a solution around threat protection, prevention of attacks, and monitoring their hybrid infrastructure.

Business Challenges: Below are some of the business challenges customers want to solve.

  • Monitoring telemetry from diverse on-premises and Azure resources.
  • Threat protection for Azure workloads and on-premises.
  • Difficult to detect, hunt, prevent, and deliberate attacks and threats across the enterprise.
  • Collect monitoring data from VM workloads in Azure, on-premises, and Store Logs in a central location.

Solution Strategy:

Recommended Architecture

Security Toll gate Architecture
    • Deploy Log Analytics workspace to collect the monitoring data from workloads in Azure and On-premises.
      • Sign in to the Azure portal with Security Admin privileges.
      • Create a Log Analytics workspace in the desired subscription, Resource Group, and location.
      • Named it DFC-Sentinel-LAW to identify it easily.
    • Enable Defender for Cloud
      • Sign in to the Azure portal with Security Admin privileges.
      • Select Defender for Cloud in the panel.
      • Upgrade Microsoft defender for the cloud, on the Defender for cloud main menu, select getting started.
      • Select your desired subscription and log the analytics workspace we created, “DFC-Sentinel-LAW,” from the drop-down menu.
      • In the Install Agents dialog box, select the install agents button.
      • Enable automatic provisioning, and Defender for cloud will install the Log Analytics Agent for Windows and Linux on all supported Azure VMs.
    • Note: We strongly recommend automatic provisioning, but you can manage it manually and turn off this policy.


    • Enable Microsoft Defender for monitoring the on-premises workloads.
      • On the Defender for Cloud – Overview blade, select the Get Started tab.
      • Select Configure under Add new non-Azure computers and Select your Log Analytics workspaces.
      • Select the log analytics workspace and download the agent from the direct agent blade.
      • Copy Workspace ID and Primary Key and keep it in a safe place.
      • Use Workspace ID and Primary Key to configure the agent.
    • Install the Windows agent.
      • o Copy the file to the target computer and then Run Setup.
      • o Select agree on the license, Next.
      • o Keep the default installation folder on the Destination Folder page and then select Next.
      • o On the Agent Setup Options page, choose to connect the agent to Azure Log Analytics and then select Next.
      • o On the Azure Log Analytics page, paste the Workspace ID and Workspace Key (Primary Key) that we copied into Notepad in the previous steps.
      • o Select the Azure Commercial from the drop-down list.
      • o After you provide the necessary configuration settings, select Install.
      • o Agent gets installed on the target machine.
    • Note: If you have a proxy server in your environment, go to the Advanced option and configure the proxy server URL and Port number.


    • Install the Linux agent.
      • On your Linux computer, open the file that you previously saved. Select and copy the entire content, open a terminal console, and then paste the command.
      • Once the installation finishes, you can validate that the omsagent is installed by running the pgrep command. The command will return the omsagent process identifier (PID). You can find the logs for the agent
        at: /var/opt/microsoft/omsagent/”workspace id”/log/.
    • Enable Defender for Cloud monitoring of Azure Stack VMs
      • Sign into your Azure Stack portal.
      • Go to the Virtual machines page and select the virtual machine you want to protect with Defender for Cloud.
      • Select Extensions and click Add. It displays the list of available VM extensions.
      • Select the Azure Monitor, Update, and Configuration Management extensions, and then Create.
      • On the Install extension configuration blade, paste the Workspace ID and Workspace Key (Primary Key) that you copied into Notepad in the previous steps. Once the extension installation completes, It might take up to one hour for the VM to appear in the Defender for Cloud portal.
  • Enable Microsoft Sentinel
    • Sign in to the Azure portal, Search for Microsoft Sentinel, and select.
    • Select Add, and on the Microsoft Sentinel blade, select Defender for Cloud-Sentinelworkspace.
    • In Microsoft Sentinel, select Data connectors from the navigation menu.
    • From the data connectors gallery, select Microsoft Defender for Cloud, and select the Open connector page button.
    • Under Configuration, select Connect next to the subscription you want alerts to stream into Microsoft Sentinel.
    • The Connect button will be available only if you have the required permissions and the Defender for Cloud subscription.
    • After confirming the connectivity, close the Defender for Cloud Data Connector settings and refresh.
    • It will take some time to sync the logs with Microsoft Sentinel.
    • Under Create incidents, select Enabled to turn on the default analytics rule that automatically creates incidents from alerts. In the Active rules tab, you can then edit this rule under Analytics.
    • To use the relevant schema in Log Analytics for the Microsoft Defender for Cloud alerts, search for Security Alert.

Outcome & Benefits:

  • Consolidated monitoring solution for On-premises and other cloud resources.
  • Security incident monitoring by Azure defender service proactively.
  • End-to-end visibility of the organization’s security-related posture.
  • Detect, hunt, prevent, and respond to threats-based solutions across the enterprise.

Infrastructure as a code – Automate infrastructure deployments in Azure

Business Scenario:

The following are some reasons why you might want to use IaC (infrastructure as code).

  • In a traditional environment, infrastructure management and configuration were done manually. Each environment has its unique configuration, which is configured manually, and that leads to several problems.
  • Cost as you must hire many professionals to manage and maintain infrastructure.
  • Scaling as a manual configuration of infrastructure tasks is time-consuming, making you struggle to meet spikes on request.
  • Inconsistency because the manual configuration of infrastructure is error-prone. When several people do manual configurations, errors are unavoidable.
  • A major problem is setting up monitoring and performance visibility tools for big infrastructure.

Challenges:

The following are some challenges in above business scenario.

  • The limited scale of deployments.
  • Poor scalability and elasticity of the infrastructure.
  • Extremely low cost-optimization levels.
  • The human error element was universal.
  • Major difficulties with configuration drifts and the management of vast infrastructures
  • Slow provisioning of infrastructure.
  • All these pitfalls combined account for the extremely low agility of a business using traditional infrastructures.

Solution Strategy:

This article explains how to provision and deploy a three-tier application to Azure using Terraform. The steps below show how to deploy a simple PHP + MSSQL application to Azure App Service using Terraform.


Solution Strategy
Basic Prerequisite
  1. Azure Account with an active subscription. You can get a Azure free account
  2. Install Azure CLI on your host.
  3. Code Editor (Visual Studio Code preferably)
  4. Install Git and a GitHub Account.
  5. MSSQL tool to manage your DB (Azure Data Studio app, this might not be necessary if your application has a backend that manages your database)
  6. Install Terraform on the host.
  7. Azure Service Principal: is an identity used to authenticate to Azure.
  8. Azure Remote Backend for Terraform: we will store our Terraform state file in a remote backend location. We will need a Resource Group, Azure Storage Account, and a Container.
  9. Azure DevOps Account: we need an Azure DevOps account because is a separate service from the Azure cloud.
Azure portal login using Azure CLI from visual studio terminal.
  1. Login to azure subscription.
    az login
  2. If you need to change your default subscription.
    az account set-subscription “subscription-id”
  3. Verify terraform version.
    terraform -version
Implement the Terraform code.
    1. Create a directory in which to evaluate the Terraform code and make it the current directory.
    2. Download the terraform code files from my GitHub project.
      git clone https://github.com/mkdevops23/Terraform-code.git

Terraform Code

    1. Create a file named providers.tf and insert the downloaded file code.
    2. Create a file named variables.tf and insert the downloaded file code.
    3. Create a file named terraform.tfvars and update each variable value as per your requirement.

Terraform Variables

  1. Create a file named outputs.tf and insert the downloaded variables file code.
  2. Create a file named main.tf and insert the downloaded variables file code.
Initialize Terraform
  • Run terraform init to initialize the Terraform deployment. This command downloads the Azure provider required to manage your Azure resources.
    terraform init
Create a Terraform execution plan.
  • Run terraform plan to create an execution plan.
    terraform plan -out main.tfplan
Apply a Terraform execution plan.
    • Run terraform apply to apply the execution plan to your cloud infrastructure.
      terraform apply main.tfplan

Terraform Execution

Verify all infrastructures are deployed.
    • Once deployment is completed on terraform console, navigate to Azure portal, find the resource group, and preview your resources.

Terraform Deployed

Terraform state file.

So now, we know that our Terraform code is working perfect. However, when we ran the Terraform Apply, a few new files were created in our local folder:

Terraform State

Terraform Destroy

We can use the ‘Terraform DESTROY’ command to remove all the infrastructure from your subscription, so we can look at moving our state file to a centralized area.
terraform plan -destroy -out main.destroy.tfplan
terraform apply main.destroy.tfplan

Import the pipeline into Azure DevOps
    1. Open your Azure DevOps project and go into the Azure Pipelines section.
    2. Select Create Pipeline button.
    3. For the Where is your code? option, select GitHub (YAML).
    4. At this point, you might have to authorize Azure DevOps to access your organization. For more information on this topic, see the article, Build GitHub repositories.
    5. In the repositories list, select the fork of the repository you created in your GitHub organization.
    6. In the Configure your pipeline step, choose to start from an existing YAML pipeline.
    7. When the Select existing YAML pipeline page displays, specify the branch master and enter the path to the YAML pipeline: https://github.com/mkdevops23/Terraform-code/blob/main/Terraform-code-CI.yml
    8. Select Continue to load the Azure YAML pipeline from GitHub.
    9. When the Review your pipeline YAML page displays, select Run to create and manually trigger the pipeline for the first time.
    10. Verify the results.
      You can run the pipeline manually from the Azure DevOps UI. Once you’ve done that step, access the details in Azure DevOps to ensure that everything ran correctly.

Verify the Results

Outcome & Benefits:

Automating infrastructure with Terraform and DevOps templates help us:

  • Automation of Infrastructure management allows you to create, provision, and alter your resources using template-based configuration files.
  • Automation across several clouds that is platform agnostic – It is likely the only full-featured automation solution that is platform agnostic and can be used to automate on-premises and cloud (Azure, AWS, GCP) systems.
  • Before implementing infrastructure changes, be sure you understand what’s going on – Terraform plans may be used for configuration and documentation. This ensures your team understands how your infrastructure is configured and how changes might influence it.
  • Reduce the risk of deployment and configuration errors.
  • Easily deploy many duplicate environments for development, testing, QA, UAT, and production.
  • Reduce costs by provisioning and destroying resources as needed.